remark和unified学习
remark
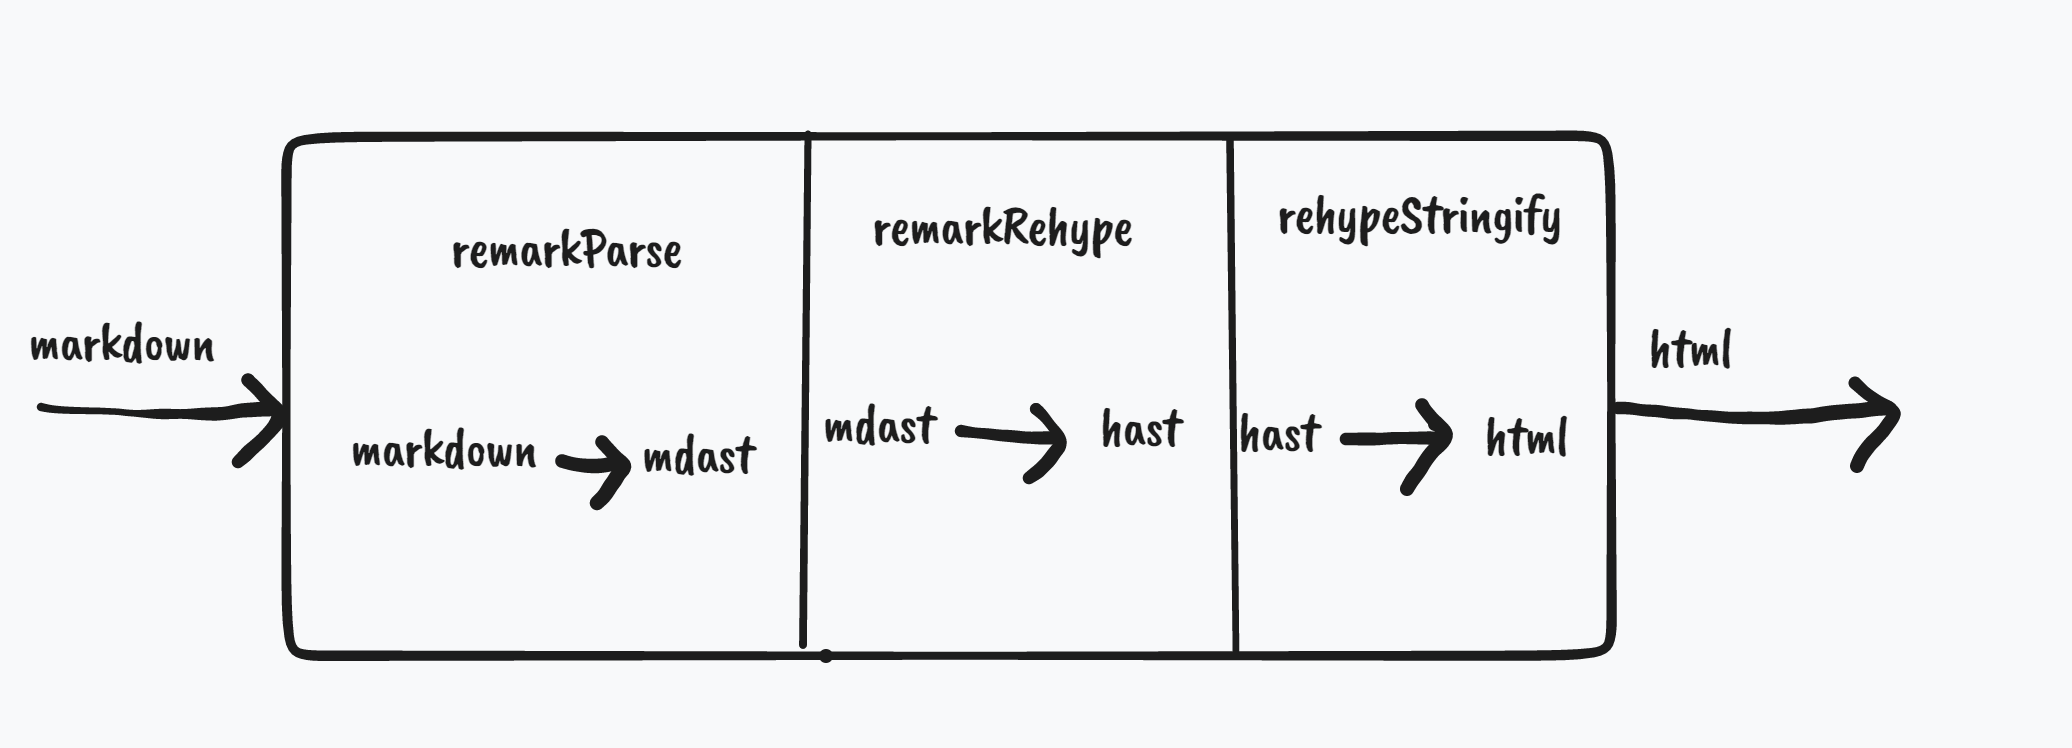
remark不单单是一个markdown的编译工具,更准确地说,它是一个围绕markdown的生态。通过插件化的方式,对mdast进行修改,使其转化成我们想要的样子。remarkParse就是将markdown编译为mdast的插件。
import {unified} from 'unified'
import remarkParse from 'remark-parse'
import remarkRehype from 'remark-rehype'
import rehypeSanitize from 'rehype-sanitize'
import rehypeStringify from 'rehype-stringify'

main()

async function main() {
  const file = await unified()
    .use(remarkParse) // markdown -> mdast
    .use(remarkRehype) // mdast -> hast
    .use(rehypeSanitize) // sanitize HTML
    .use(rehypeStringify) // hast -> string
    .process('# Hello, Neptune!')

  console.log(String(file))
}
unified
unified相当于一种管道传输的思想,我们把内容放到管道里,先对其解析,解析为ast,再使用一个一个插件处理ast,管道中的内容是以ast的形式传输的,最终将ast编译,并在管道的另一头获取到被处理后的内容。
| ........................ process ........................... |
| .......... parse ... | ... run ... | ... stringify ..........|

          +--------+                     +----------+
Input ->- | Parser | ->- Syntax Tree ->- | Compiler | ->- Output
          +--------+          |          +----------+
                              X
                              |
                       +--------------+
                       | Transformers |
                       +--------------+
unified其实际上只是一个配置processor的过程,unified()返回值是一个processor,processor.use()返回是一个被配置过的processor,在配置一个插件后,我们可以使用processor.process()或processor.processSync()处理。
processor.processSync(file:VFile|undefined):VFile
如果我们传入的值不是VFile,则会自动的使用new VFile(x) 将其转化为VFile
输出的VFile我们可以使用String(VFile) 或 VFile.toString()获取到其中的内容
Plugin
插件是用于配置processor的,那么我们该如何写一个自己的插件呢
function attacher(options?)
parameters
options -- configuration
Return
transformer
Plugin应该是一个可以接收options,并且返回transformer的函数
function transformer(tree,file[,next])
transformer是用来处理syntax tree和VFile的函数。
以下是官方的例子
move.js
export function move(options) {
  if (!options || !options.extname) {
    throw new Error('Missing `options.extname`')
  }

  return function (tree, file) {
    if (file.extname && file.extname !== options.extname) {
      file.extname = options.extname
    }
  }
}
index.js
import {read, write} from 'to-vfile'
import {reporter} from 'vfile-reporter'
import {unified} from 'unified'
import remarkParse from 'remark-parse'
import remarkRehype from 'remark-rehype'
import rehypeStringify from 'rehype-stringify'
import {move} from './move.js'

const file = await unified()
  .use(remarkParse)
  .use(remarkRehype)
  .use(move, {extname: '.html'})
  .use(rehypeStringify)
  .process(await read('index.md'))

console.error(reporter(file))
await write(file) // written VFile to ‘index.html’
index.html
<h1>Hello, world!</h1>
实际应用
这是在我写一个vscode的插件时碰到的问题,这个vscode插件是用于预览markdown的,虽然插件市场已经有很多预览markdown的插件了,但是由于一些原因,这个插件需要使用remark来实现,所以需要重新做一个。
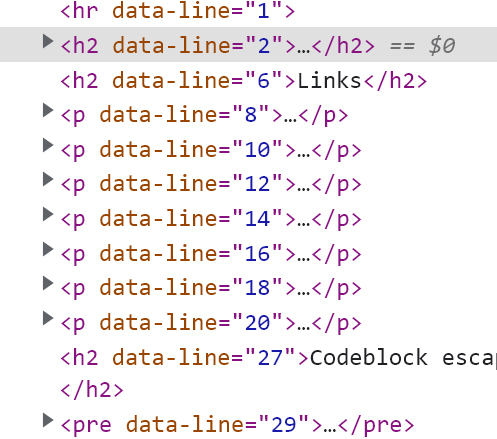
在需要实现滚动锁定功能的时候,其他插件的实现方法是,对每一个HTML Element添加一个属性:data-line(指的是该html在编辑器的位置),这样我在滚动预览页面的时候就只需要找到能看到的最上面的HTML Element 再找到与之对应的data-line 接着滚动编辑器即可。
因此思路也非常清晰了,我们需要在对hast的处理过程中加上一步(添加data-line属性),接着,我们开始编写此插件
rehype-source-line.ts
import {visit} from 'unist-util-visit';// 用于访问语法树的节点

export default function rehypeSourceLine() {
  return (tree:any) => {
    visit(tree, (node) => {
        if(node.position && node.properties){
          node.properties.dataLine = node.position.start.line;
        }
    });
  };
}
让我们来看看效果
ok,那么这样一个简单的插件就完成了。